.png)
Connecticut Kitchen Remodel Guide: Costs, Timeline, ROI
If your Connecticut kitchen has great bones but clunky storage, or you’re ready for a complete gut, this guide shows how to plan a beautiful, efficient, code-compliant project without surprises. We’ll cover real-world cost ranges, a typical 6–10 week timeline, layout and storage ideas, permit tips, and the upgrades that deliver the best ROI in CT homes.
Want a tailored plan with options and pricing? Explore Kitchen Remodeling, browse our Gallery, or request a free quote with Carpentry & Handyman Concepts (licensed & insured).
Section 1: What Drives Kitchen Remodel Cost in Connecticut?

Every home is different, but five levers shape most budgets:
- Scope & Layout Changes
- Pull-and-replace: New cabinets, counters, and lighting in the same layout.
- Re-layout: Move plumbing, add an island/peninsula, widen doorways.
- Structural: Remove a wall, add a beam, reframe windows.
- Cabinetry Level
- Stock/semi-custom: Faster lead times, strong value.
- Inset/custom: Furniture-grade fit, premium finishes; requires tight tolerances.
- Surfaces & Appliances
- Counters: Honed quartz or marble; butcher-block accents.
- Backsplash: Slab stone or handmade tile.
- Panel-ready appliances: For a “quiet” integrated look.
- Lighting & Electrical
- Layered lighting (recessed, under-cab, pendants), updated circuits, dedicated lines for built-ins.
- Finish Carpentry & Details
- Crown, light rail, paneled ends, fluted or beaded accents, plaster or paneled hood, and scribed panels.
Typical CT Ranges (ballpark, not a bid):
- Cosmetic mini-refresh (paint, hardware, small lighting): $8k–$20k
- Pull-and-replace (same layout): $35k–$75k+
- Re-layout with surface upgrades: $70k–$120k+
- Custom/inset, panel-ready, specialty surfaces: $120k–$200k+
We’ll build a good/better/best estimate during your Kitchen Remodeling consult so you can compare options line by line.
Section 2: A Realistic 6–10 Week Timeline (What Happens When)
Week 0–2: Design & Ordering
- Measure, layout options, appliance selections.
- Cabinet order placed; long-lead items (tile, lighting) reserved.
- Permit submitted if layout/electrical/mechanical changes are planned.
Week 3–4: Prep & Demo
- Site protection, dust control.
- Demo cabinets/counters/backsplash; rough framing as needed.
Week 4–5: Rough-Ins
- Electrical circuits, plumbing points, venting for hood; inspection.
Week 5–6: Walls & Floors
- Close walls; patch/skim; prime.
- Flooring install/refinish (if applicable).
Week 6–8: Cabinets & Trim
- Set boxes level and plumb; scribe end panels; tune reveals (±1/32”).
- Crown, light rail, paneled ends, appliance panels, and hood framing.
Week 8–9: Counters & Tile
- Counter template → install (usually 7–10 business days after template).
- Backsplash tile or slab; plumbing set.
Week 9–10: Final Touches
- Lighting trim-out, hardware, caulk/paint.
- Final clean and walkthrough.
Need a phased approach to keep a working sink? Ask about temporary kitchens and weekend milestones during your free quote.
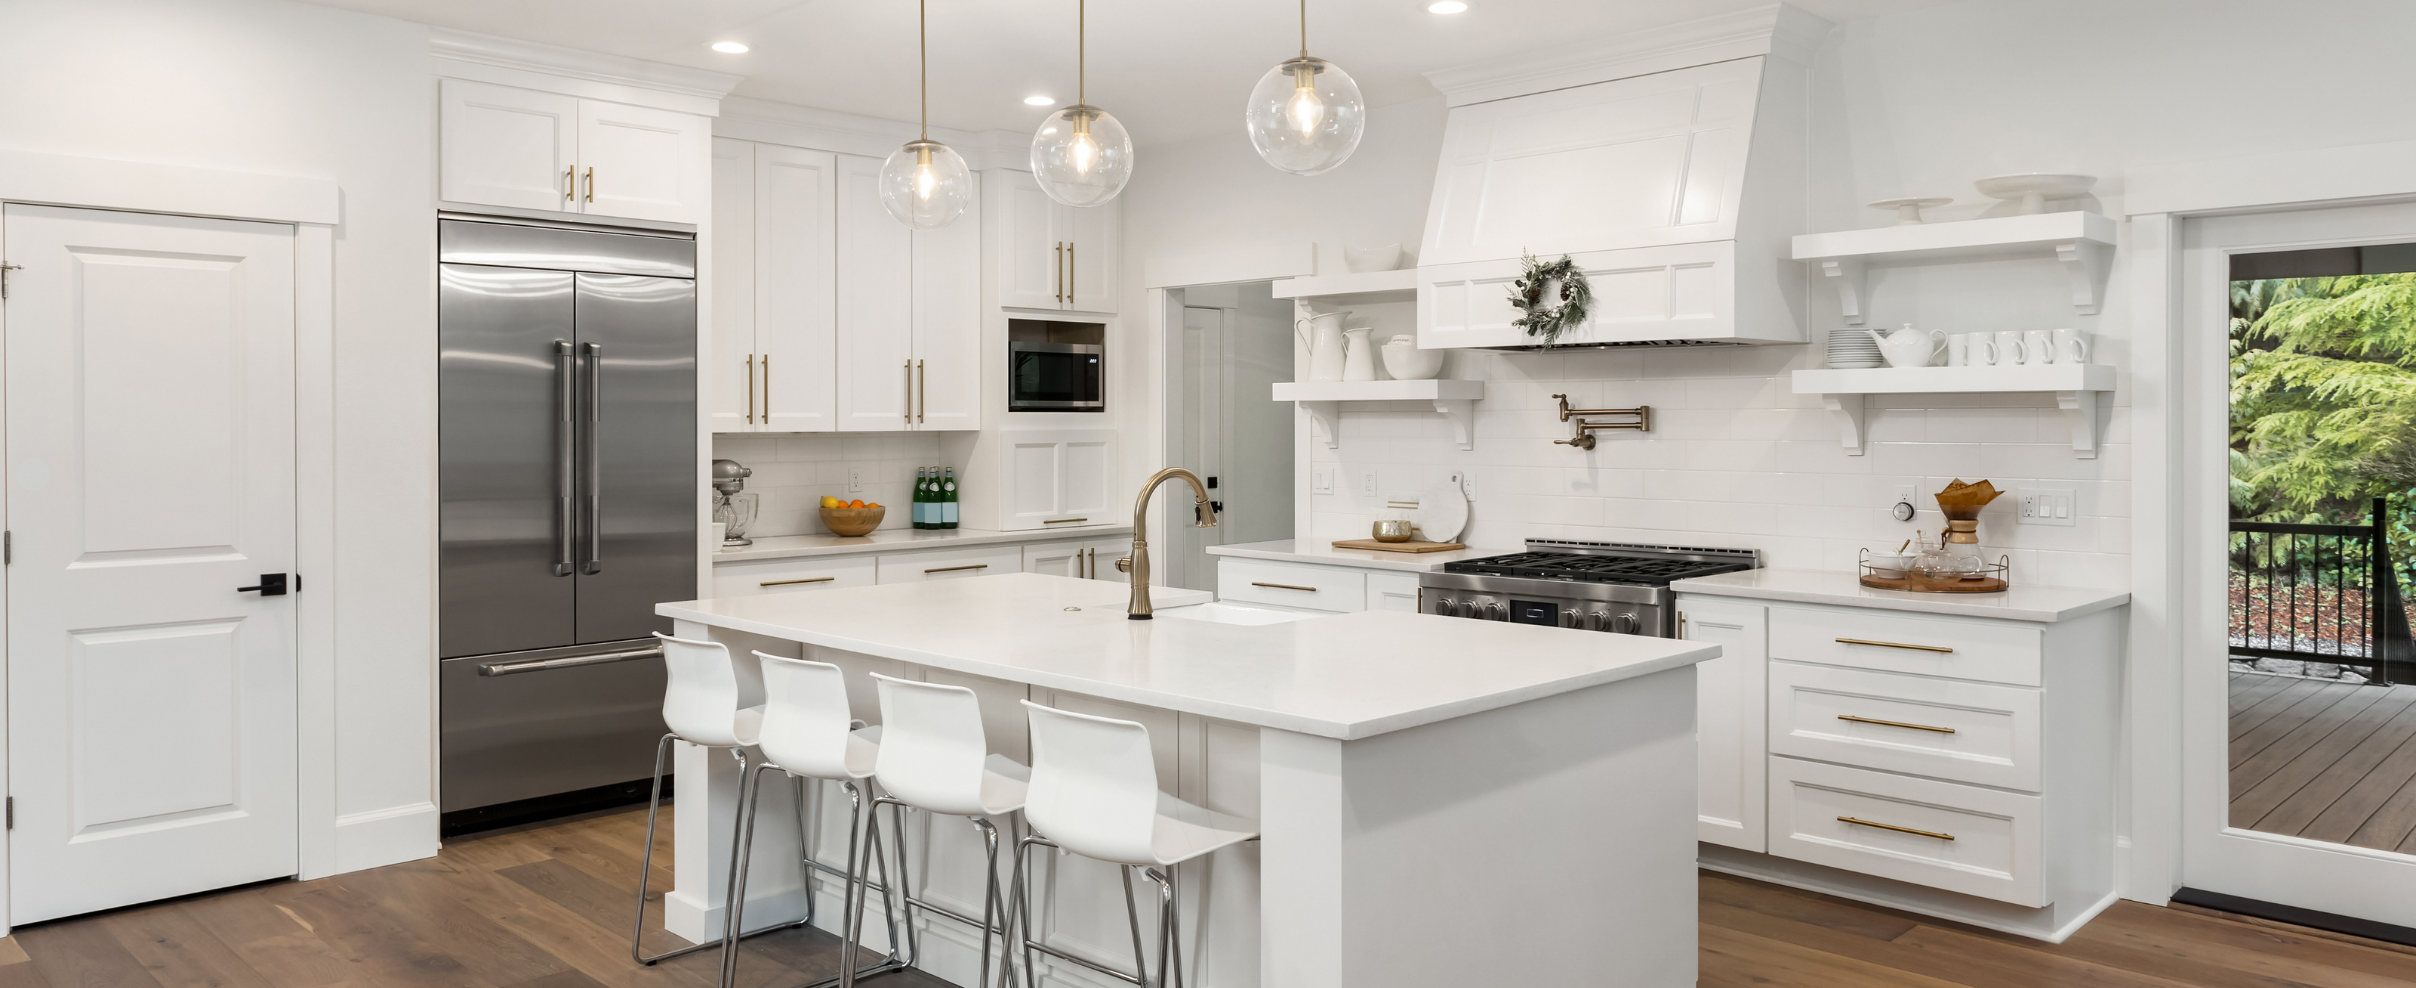
Section 3: Layouts CT Homeowners Love (and Why)
- Island with deep drawers: Pots/pans live at hip height, not in a crouch zone.
- Peninsula for narrower rooms: Saves aisle width while keeping seating.
- Work zones: Prep, cook, clean, coffee—tools live where you use them.
- Panel-ready fridge + hutch: Quiet focal wall that feels like furniture.
- Plaster/paneled hood: Scaled to cooktop width to +6” total for presence.
We’ll mock up two or three options and flag carpentry impacts (fillers, door swing, hood width). See how we build clean lines on Custom Carpentry.
Section 4: Storage That Makes a Small Kitchen Feel Big
- Full-height pantry with roll-outs (no black-hole shelves).
- Deep drawers with pot-peg systems.
- Tray dividers near ovens; spice pullouts flanking the range.
- Appliance garage with outlets; charging drawer to hide cords.
- Corner solutions: LeMans trays or drawers with notched backs.
During planning, we inventory your gear so every item has a home, keeping the kitchen’s exterior visually calm.
Section 5: Surfaces That Age Gracefully in CT
- Counters: Honed quartz (low maintenance) or New England favorites like Danby/Carrara marble (embrace patina).
- Edges: Eased, small ogee, shallow bevel, timeless, and hand-friendly.
- Backsplash: Slab stone for easy cleaning or handmade tile in quiet tones.
- Flooring: Site-finished white oak; porcelain or stone in mudroom thresholds.
Section 6: Lighting = Mood + Safety
- Ambient: low-glare recessed or semi-flush fixtures.
- Task: continuous under-cab LEDs at 2700–3000K, no hotspots.
- Accent: pendants, picture lights on a hutch, toe-kick LEDs.
- Dimmers with Breakfast / Prep / Dinner / Late Night scenes.
Section 7: Permits, Codes & Inspections in Connecticut
- Layout changes, venting, and new circuits usually trigger permits.
- Hoods: verify CFM/makeup air thresholds with local code.
- Safety: GFCI/AFCI protection, outlet spacing rules, and lighting box support.
We coordinate with your GC and local inspectors so you don’t have to chase paperwork.
Section 8: Where the ROI Lives
If resale matters in the next 5–8 years, prioritize:
- A livable layout (clear aisles, logical zones).
- Cabinet quality & hardware (daily touchpoints).
- Counters with permanence (honed quartz or classic marble).
- Layered lighting (task + ambient + accent).
- Finish carpentry (reveals, crown, panels) that screams “custom.”
Small, confident palettes and quiet metals outlast bold, mix-and-match trends.
FAQs
How do I keep costs predictable?
Lock the layout early, order long-lead items first, and stick to a transparent allowance sheet.
Can I keep part of my kitchen operational?
Often yes, sink or temporary tops. We’ll map a phased plan.
Inset vs. overlay?
Inset is premium and requires precision; we do both and will explain tradeoffs.
Our Process (Fast, Clean, Professional)
- Consult & Free Quote: Photos + measurements → options + ballpark.
- Plan & Measure: Layout, reveals, hood geometry, and lighting runs.
- Build & Install: Scribed panels, coped crown, tuned doors, tidy site.
- Walkthrough: Caulk/paint, dimmers, stone sealed, final alignment.
You can call us today to get a free quote. → Carpentry & Handyman Concepts
Start Planning Your Project With A Free Quote!
Book Your Free EstimateRead our latest blog


Flexible Financing With Klarna
We’ve partnered with Klarna to make your next project stress-free. Split your payments into easy installments, enjoy transparent pricing, and get the home upgrades you need now, without waiting.
.png)
Customer Reviews
"Thank you so much, I am very pleased with your work. All of the doors look great. I appreciate your suggestion to do all of the doors, including the inside doors. Much more elegant. You have a great team."
-Susan K.
"Dave was very easy to work with and his prices were reasonable. He would come by to check on his crew and the job. I would definitely recommend Carpentry and Handyman Concepts."
-Kathy L.
"David, and his team are highly skilled pro’s and very knowledgeable about the business, they do an excellent job! I highly recommend them if you are in need of Carpentry And Handyman services."
-Blaine B.
"I would highly recommend Dave from Carpentry and Handyman Concepts. They were efficient, professional, and very knowledgeable. I will definitely have them back at my house for my next project."
-Ashley R.
"Dave and his guys did a great job on a couple of jobs I needed done. So great that I’ve already referred them to someone else! I will definitely be using them again."
-Pam F.
"I would hire David Grecco again in a heartbeat. They were professional, experienced, and good people. I will definitely use him again! Thank you, Linda"
-John O.

Our Location & Business Information
Proudly serving Fairfield County, CT, including Norwalk, Westport, New Canaan, Darien, and Wilton. We deliver licensed, insured, and reliable carpentry, remodeling, and handyman services.